Yummy Crunchy Apple Pie

Yummy Crunchy Apple Pie

delicious apple pie

Reviewed by Arturs Arnicans
Prep Time: 40m
Cook Time: 50m
Total Time: 1h 30m
Temp.: 375 °F
Servings: 8
Difficulty: Easy
4.9 (14 Reviews)
Cooking Mode
Prevents your screen from turning off while cooking

Ingredients

Adjust servings:

For pie:

For crumb topping:

Nutritional Information

414
Calories
14.8g
Fat
31mg
Cholesterol
336mg
Sodium
68.3g
Carbohydrate
4.6g
Protein
Yummy Crunchy Apple Pie

Recipe Description

I adore this Yummy Crunchy Apple Pie. Not only is super simple to make, but it tastes absolutely delicious too. My secret tip when making this pie is to use pre-made pastry. Just add apples and top with a delicious crumb for an amazing dessert.

To make this, start by placing apple filling in a refrigerated pie crust. Make a crumb topping by combining brown sugar, flour, oats, nuts and butter. Top the pie with the crumb topping and bake in the oven. Leave to cool before serving. Enjoy!

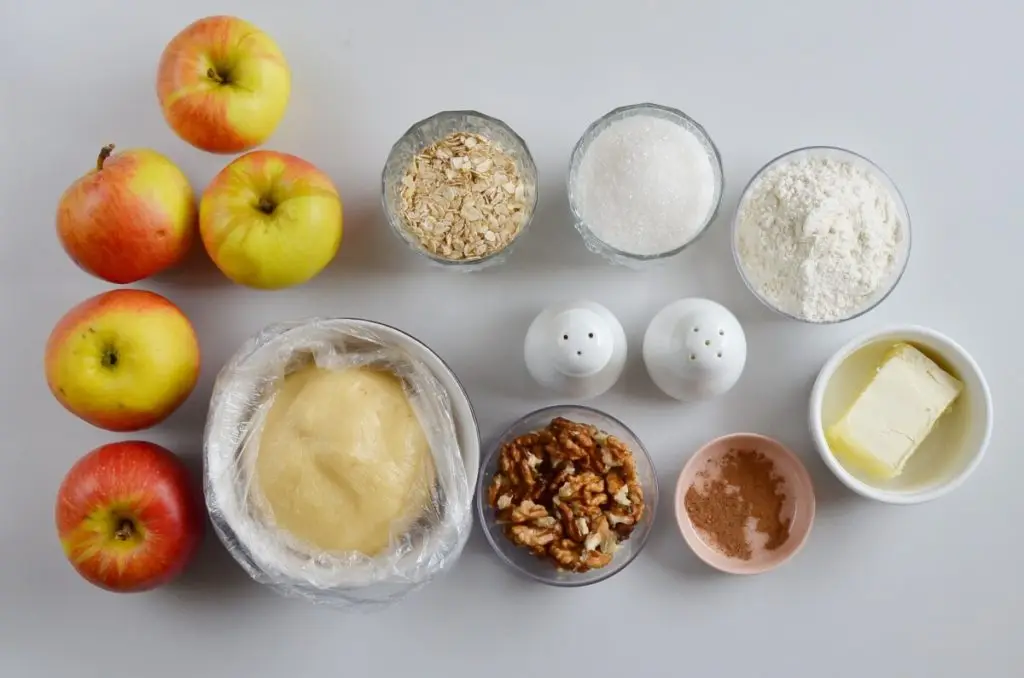
To make this Yummy Crunchy Apple Pie, you will need the following ingredients:

Ingredients for Yummy Crunchy Apple Pie

Recipe Features

Cuisine

No specific cuisine for this recipe

Steps to make

  1. 1

    Heat oven

    5 min

    Preheat the oven to 375 °F.

  2. 2

    Prepare pastry

    35 min
    Step 2 - Yummy Crunchy Apple Pie

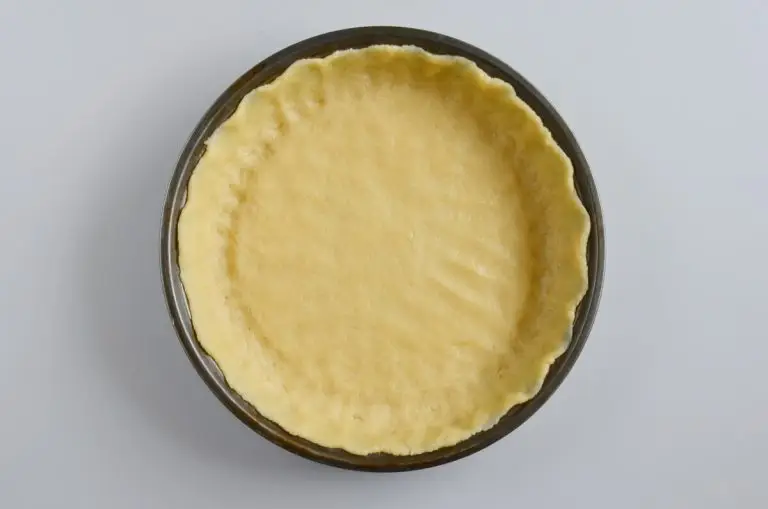
    Place pastry in a pie dish. Trim excess pastry from the edges and crimp. Loosely cover with plastic wrap and transfer to the refrigerator for 30 minutes.

  3. 3

    Make filling

    1 min
    Step 3 - Yummy Crunchy Apple Pie

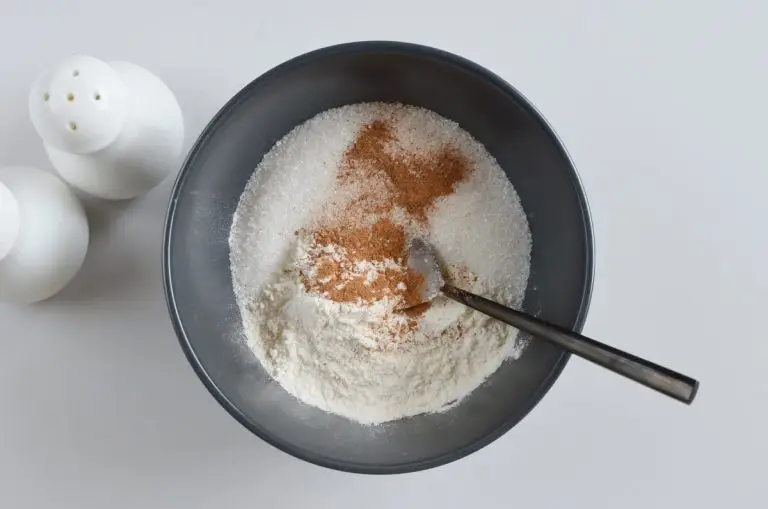
    Combine ½ a cup of sugar with 3 tablespoons of flour, ¼ teaspoon of cinnamon, ¼ teaspoon of nutmeg, ⅛ teaspoon of allspice, and ⅛ teaspoon of salt in a large mixing bowl.

  4. 4

    Mix apple slices with flour mixture

    2 min
    Step 4 - Yummy Crunchy Apple Pie

    Add 6 cups of thinly sliced peeled apples to the bowl and mix well.

  5. 5

    Transfer apple filling to pastry

    2 min
    Step 5 - Yummy Crunchy Apple Pie

    Transfer the apple and flour mixture to the pastry crust.

  6. 6

    Make crumb topping

    5 min
    Step 6 - Yummy Crunchy Apple PieStep 6 - Yummy Crunchy Apple PieStep 6 - Yummy Crunchy Apple Pie

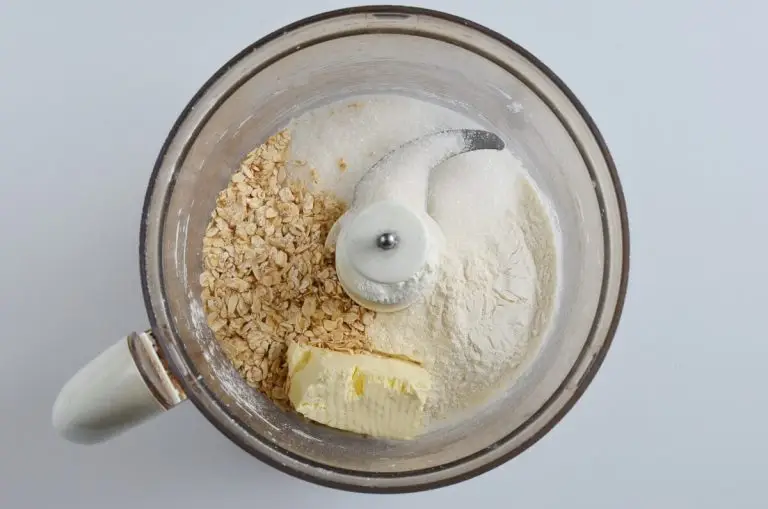
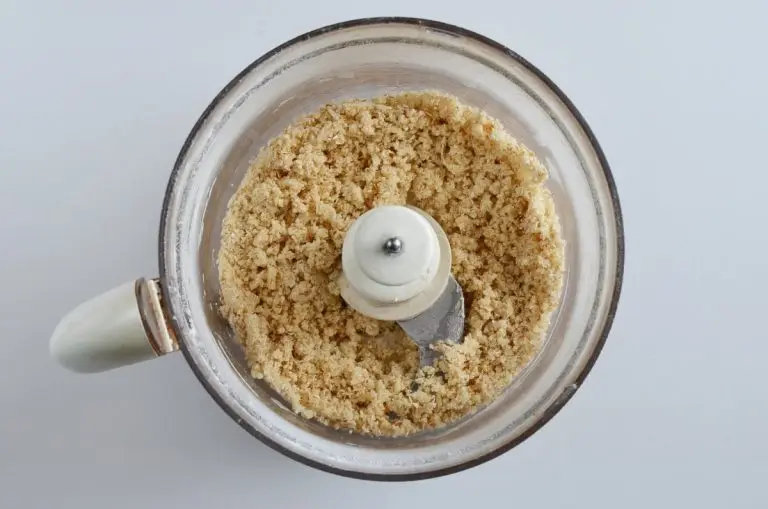
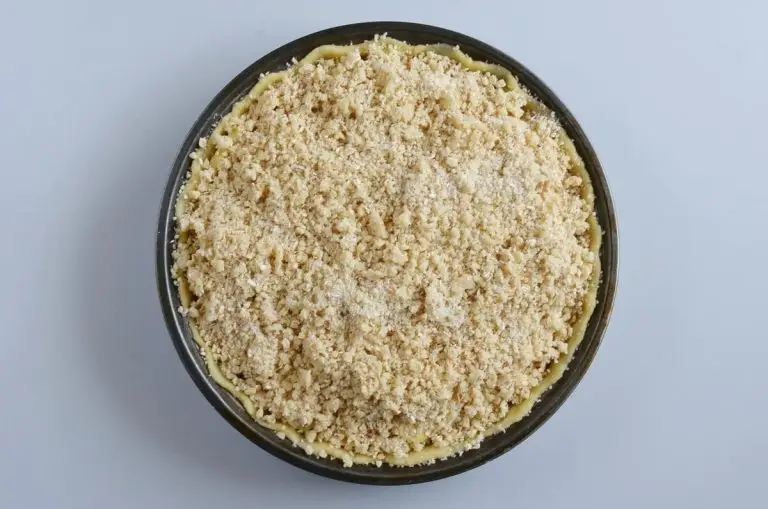
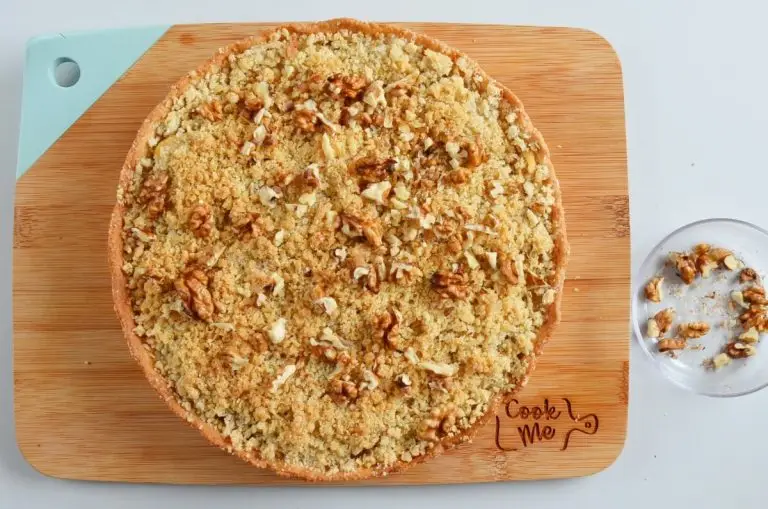
    Combine ⅔ cup of sugar with ½ cup of flour and ¾ cup of oats and ¼ cup toasted nuts. Add ½ cup of butter and cut it in using a pastry blender until you have a mixture which resembles coarse crumbs. Sprinkle the crumb topping over the apple mixture in the pie.

  7. 7

    Place foil on edges of pastry

    2 min
    Step 7 - Yummy Crunchy Apple Pie

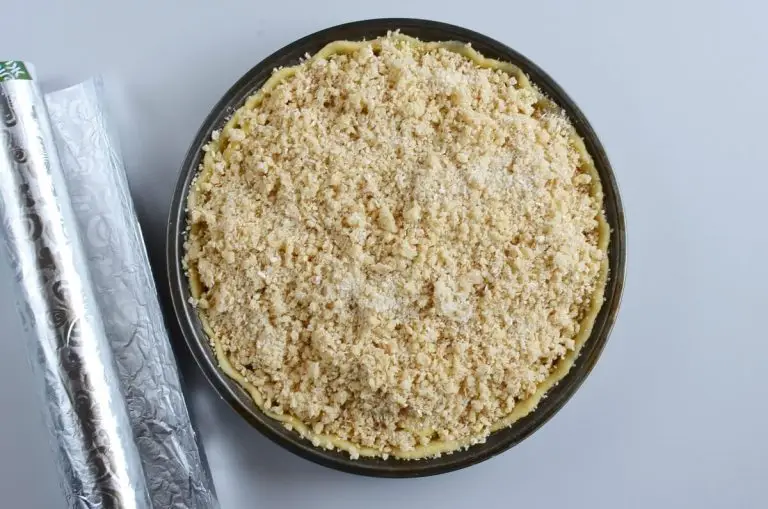
    Cover the edges of the crust with foil to prevent over-browning while baking.

  8. 8

    Bake

    50 min
    Step 8 - Yummy Crunchy Apple Pie

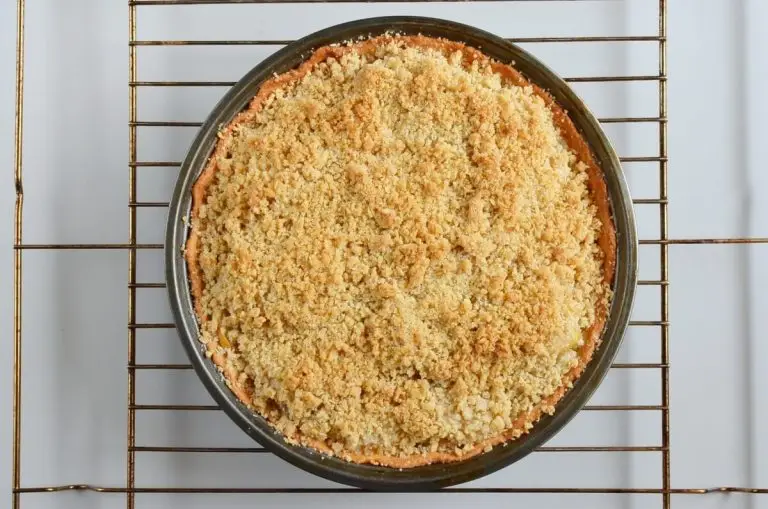
    Bake the pie in the oven for 25 minutes. Remove the foil from the edges and continue to bake for another 25-30 minutes.

  9. 9

    Leave to cool

    30 min
    Step 9 - Yummy Crunchy Apple Pie

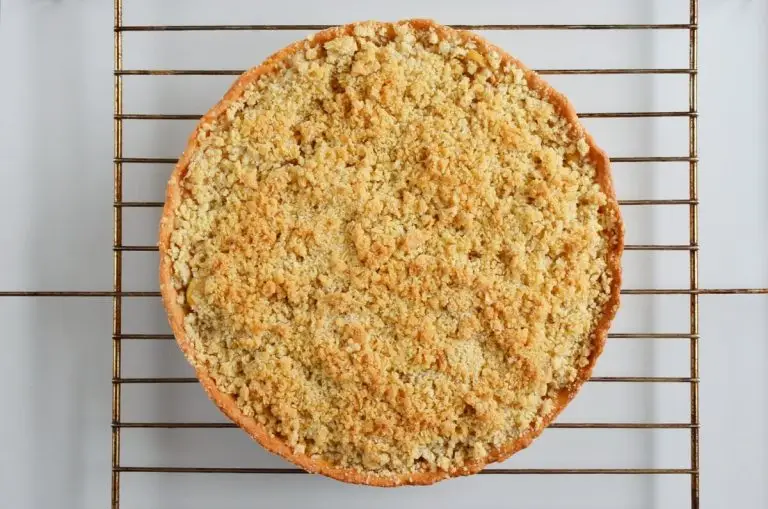
    Remove the pie from the oven and leave to cool on a wire rack.

  10. 10

    Serve

    Step 10 - Yummy Crunchy Apple Pie

    Serve with ice cream or whipped cream.

This Yummy Crunchy Apple Pie is a delicious apple pie which will go down a treat with your family. Please try this and if you do, come back and leave a comment to tell me what you think!

About the author

Jelena Mardere

Jelena is an interior designer and young mom! As a busy working mom, her time is precious so she’s always looking for a quick and efficient way to get things done. Jelena is very creative, but has a strong practical side. She loves trying new things and travels a lot, especially around Europe. The kitchen is Jelena’s safe space, where she can let her creative side out and dedicate herself to her favorite hobby - cooking!

Recipe Reviews

Have you made this recipe? Share your experience and help other cooks!

★★★★★
★★★★★
4.9 out of 5 (14 reviews)
Athina
February 26, 2021
Verified

Yummy!!! I love this pie! Thanks!

Taste of the dish
Accuracy of stated difficulty
Instruction accuracy
Would you recommend this recipe to others?
0/1000
Add photos
Upload photos of your result. This will help others see how the dish should look.

Author Information

Email will not be displayed publicly