Russian Honey Cake (Medovik)

Russian Honey Cake (Medovik)

amazing Russian inspired cake

Recipe by
Reviewed by Arturs Arnicans
Prep Time: 10m
Cook Time: 13h 40m
Total Time: 13h 50m
Temp.: 350 °F
Servings: 8
Difficulty: Easy
4.9 (21 Reviews)
Cooking Mode
Prevents your screen from turning off while cooking

Ingredients

Adjust servings:

for the cake layers

for the sour cream frosting

for the topping

Nutritional Information

514
Calories
25g
Fat
112mg
Cholesterol
190mg
Sodium
66g
Carbohydrates
6g
Protein
Russian Honey Cake (Medovik)

Recipe Description

Medovik is a Russian Honey Cake which consists of several layers of a honey flavored sponge cake with a sour cream filling, decorated with breadcrumbs and topped with fresh berries. The cake’s main ingredient is honey which gives it an amazing flavor.

To make this cake, I start with a dough which I divide into 8 pieces. I roll each piece out flat and cut them into perfect circles. Bake in the oven. Use the scraps of dough to make breadcrumbs and save them for decorating. Make a filling from cream, powdered sugar and sour cream. I use this filling to sandwich the layers together and to frost the cake. Then I dust the outside with breadcrumbs and top the cake with fresh strawberries before serving. Yum!

To make Russian Honey Cake (Medovik), you will need the following ingredients:So, how to make Russian Honey Cake (Medovik)?

Ingredients for Russian Honey Cake (Medovik)

Steps to make

  1. 1

    Heat the oven

    1 min

    Preheat the oven to 350°F.

  2. 2

    Beat sugar and eggs

    10 min
    Step 2 - Russian Honey Cake (Medovik)Step 2 - Russian Honey Cake (Medovik)

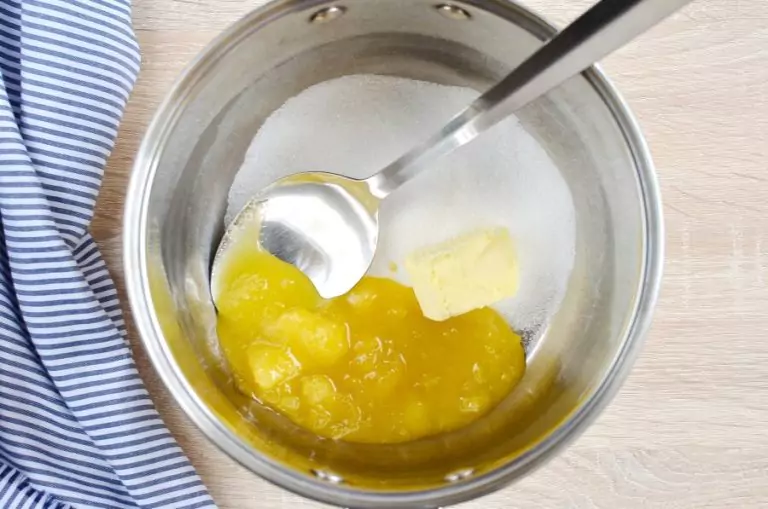
    Heat sugar, honey and unsalted butter in a medium saucepan for 5-7 minutes over medium-low heat, whisking occasionally until the sugar is dissolved. Remove the pan from the heat and gradually pour in the eggs - whisk constantly while adding the eggs to ensure they do not scramble.

  3. 3

    Add baking soda and flour

    10 min
    Step 3 - Russian Honey Cake (Medovik)Step 3 - Russian Honey Cake (Medovik)Step 3 - Russian Honey Cake (Medovik)

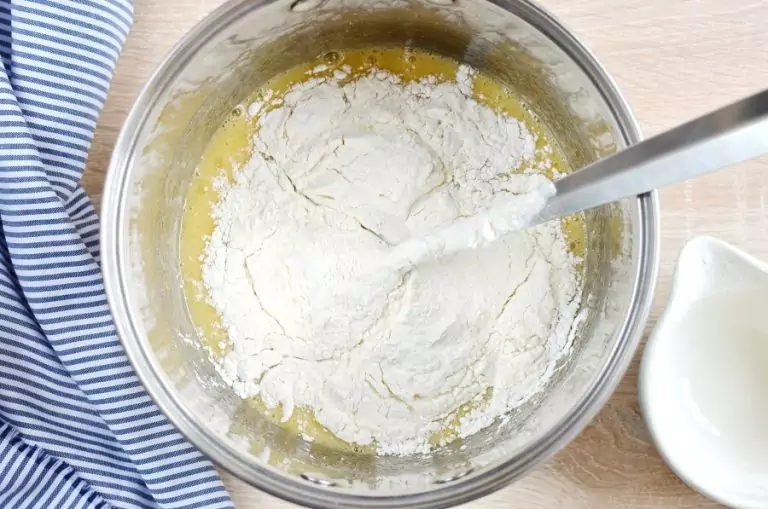
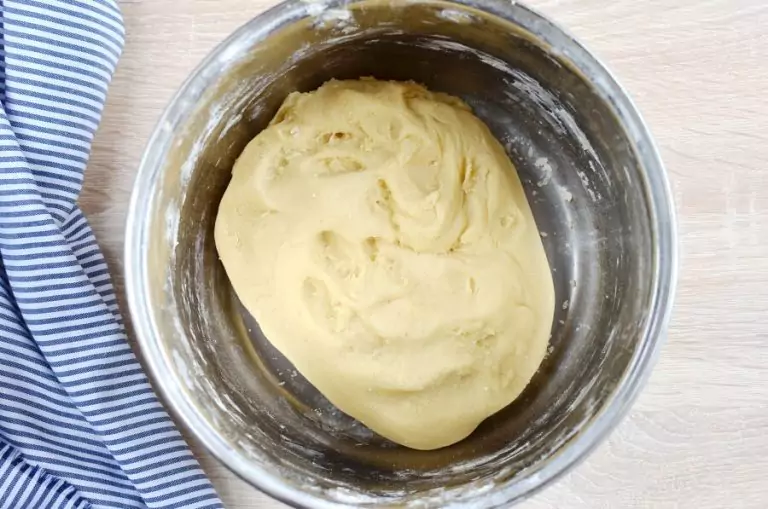
    Whisk in baking soda until there are no lumps remaining in the mixture. Fold in the flour gradually with a spatula until the dough resembles a clay consistency and doesn't stick to your hands.

  4. 4

    Divide dough and roll out

    30 min
    Step 4 - Russian Honey Cake (Medovik)Step 4 - Russian Honey Cake (Medovik)Step 4 - Russian Honey Cake (Medovik)

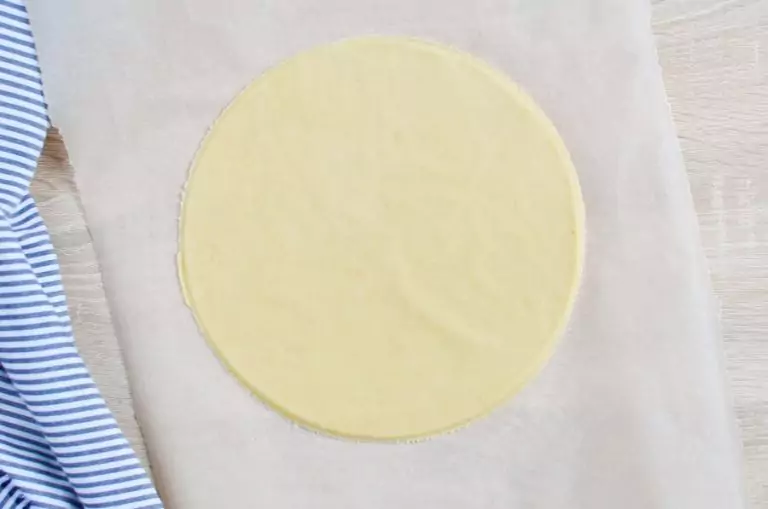
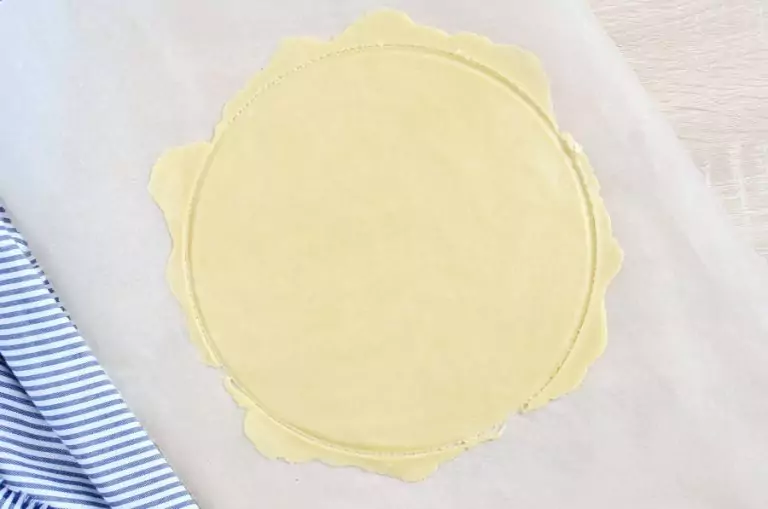
    Work quickly to divide the dough into 8 equal pieces. Roll each piece of dough out on a well-floured work surface into a thin 9 inch circle (about ⅛ inch thick). You can sprinkle the top of each layer with a little flour too to keep dough from sticking to your rolling pin. Use a plate to cut the dough into perfect circles and save the scraps of dough for later.

  5. 5

    Place dough layers on parchment paper and bake

    20 min
    Step 5 - Russian Honey Cake (Medovik)Step 5 - Russian Honey Cake (Medovik)

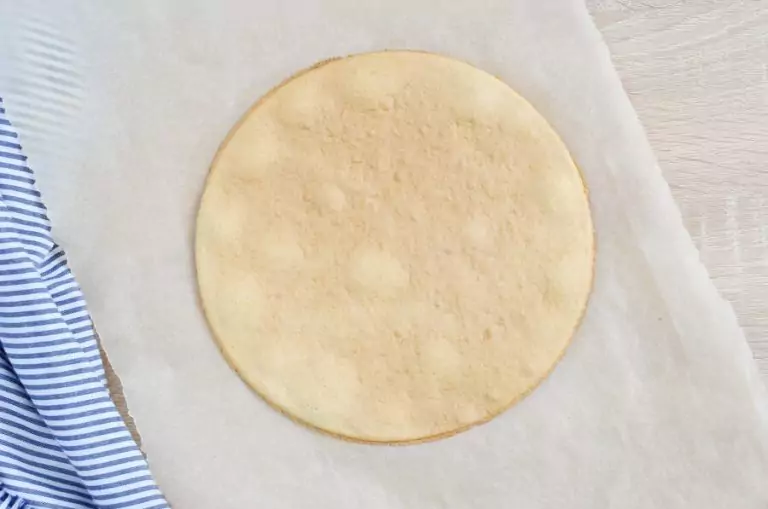
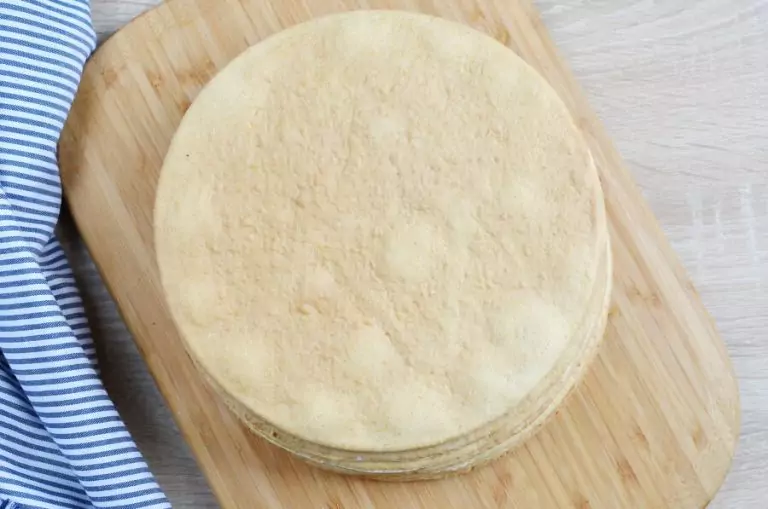
    Place each dough layer on a large sheet of parchment paper. Bake the dough in the oven (2 at a time) for 4-5 minutes, until golden brown. Transfer the layers to a wire rack and allow to cool completely before stacking. Repeat until all remaining layers are cooked.

  6. 6

    Bake the scraps of dough and make crumbs

    15 min
    Step 6 - Russian Honey Cake (Medovik)Step 6 - Russian Honey Cake (Medovik)Step 6 - Russian Honey Cake (Medovik)

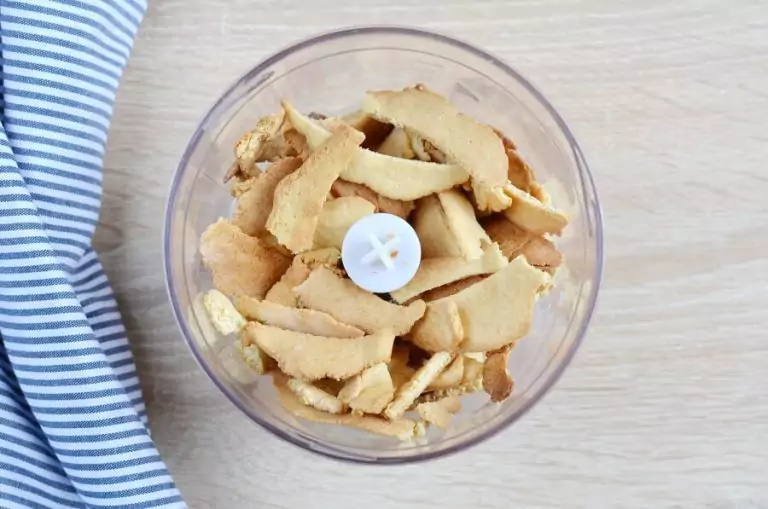
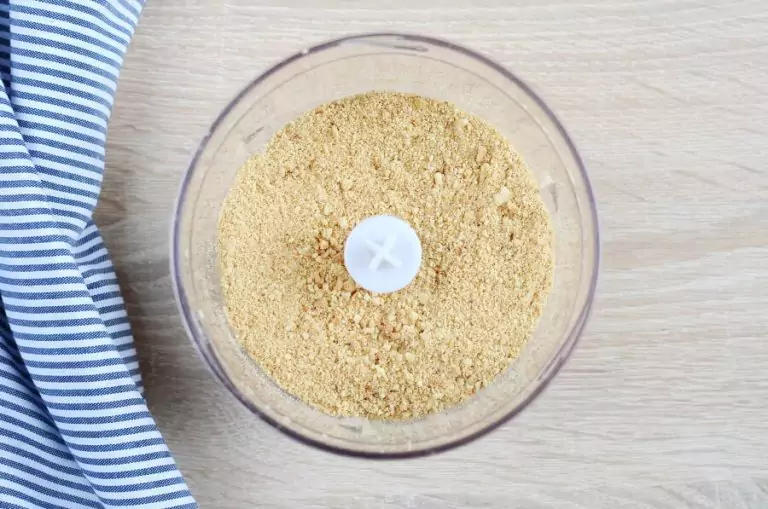
    Bake the scraps on one of the sheets of parchment paper. Once the scraps are baked, leave them to cool. Once firm, pulse the scraps in a food processor until you have fine crumbs.

  7. 7

    Whip the cream

    2 min
    Step 7 - Russian Honey Cake (Medovik)

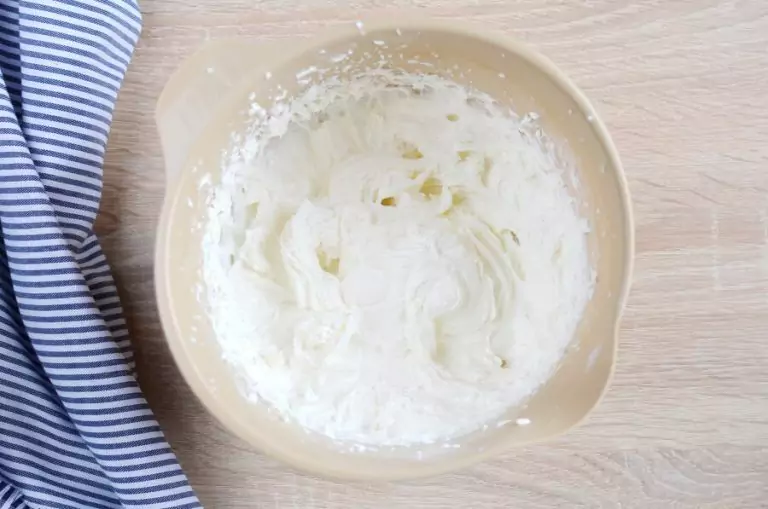
    Using an electric beater, whip the cream for 1-2 minutes until stiff peaks form.

  8. 8

    Make the sour cream filling and frosting

    3 min
    Step 8 - Russian Honey Cake (Medovik)

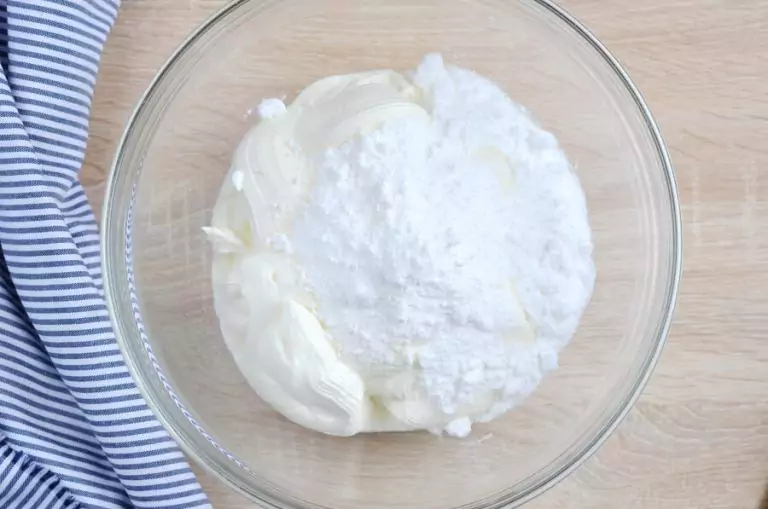
    In a separate mixing bowl, whisk the sour cream and powdered sugar together.

  9. 9

    Fold in the cream

    2 min
    Step 9 - Russian Honey Cake (Medovik)Step 9 - Russian Honey Cake (Medovik)

    Fold the whipped cream into the sour cream mixture carefully and place the filling in the refrigerator.

  10. 10

    Assemble the cake

    15 min
    Step 10 - Russian Honey Cake (Medovik)Step 10 - Russian Honey Cake (Medovik)Step 10 - Russian Honey Cake (Medovik)

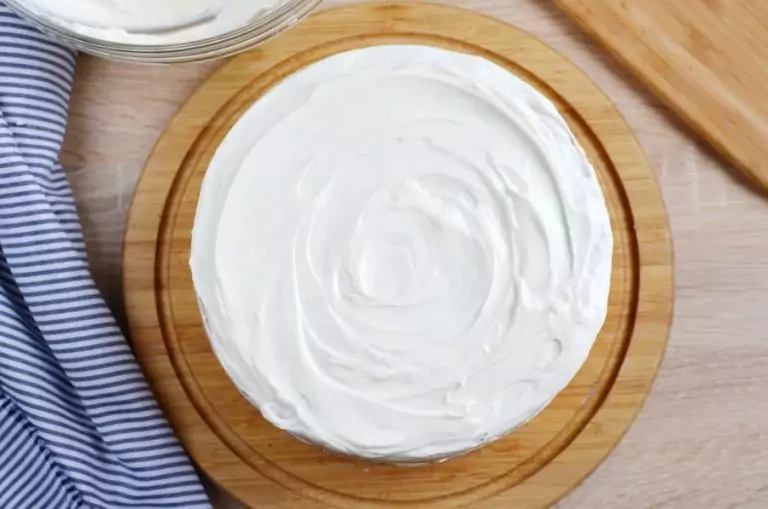
    Spread about ⅓ of a cup of frosting on each cake layer. Stack each coated layer on top of each other and press the layers down gently as you go to ensure there are no air gaps. Cover the top and sides with the remaining frosting.

  11. 11

    Dust with breadcrumbs and refrigerate overnight

    12h
    Step 11 - Russian Honey Cake (Medovik)Step 11 - Russian Honey Cake (Medovik)

    Dust the top and sides of the cake with the breadcrumbs. Cover the medovik with plastic wrap and place in the refrigerator overnight. The medovik needs time to absorb some of the filling and for the layers to soften, so make sure you leave it overnight.

  12. 12

    Serve

    Step 12 - Russian Honey Cake (Medovik)

    Decorate with fresh berries and serve large slices to your guests.

This Russian Honey Cake (Medovik) is a delicious honey infused layered cake, filled with a sour cream filling and topped with fresh strawberries. If you try making this cake, please tag #CookMeRecipes in your instagram and pinterest posts!

About the author

Bethany Lim

Bethany is very passionate about maintaining a healthy lifestyle and clean diet. She’s trying to cut meat out of her diet as much as possible and focuses on cooking vegetarian food and fish. Bethany gets a kick from finding ways to add new twists to classic dishes. What’s more, thanks to her Asian roots, she’s great at combining different cuisines to come up with something extraordinary. Bethany’s recipes will inspire you to add new colors and flavors to your everyday meals.

Recipe Reviews

Have you made this recipe? Share your experience and help other cooks!

★★★★★
★★★★★
4.9 out of 5 (21 reviews)
CheerfulCathy
April 1, 2025
Verified

Fantastic layers wow!

Peter
September 23, 2024
Verified

Simply delicious cake!

Ignacio Torres
September 1, 2024
Verified

Hice este Medovik para mi cumple y fue un hit! La combinación de miel con la crema es excepcional.

Oli
April 17, 2024
Verified

Delish!

Wendy
October 12, 2023
Verified

Superb

Ursula McKenzie
September 15, 2023
Verified

I made the Medovik for my friend's birthday and it was a hit! The honey flavor is so rich, and everyone loved the creamy filling. It felt special making it!

Sasha91
September 14, 2023
Verified

I made this Medovik for my friend's birthday, and it was a hit! The honey flavor is just perfect. I love how it looks with strawberries on top. Simple and delicious!

Bethany
August 2, 2023
Verified

OMG! This Russian Honey Cake is a total hit! Made it for my kid's birthday, and everyone loved it. The honey flavor is just so unique! I felt like a pro bakester. Thanks for sharing this gem!

Vik
July 20, 2023
Verified

Medovik was super easy to make! I surprised my friends with it last weekend, and they loved every bite.

Diana
July 2, 2023
Verified

Delicious! I made this for my kids' birthday, and they loved the layers. Honey makes it so unique, it brought back memories of my grandma's baking.

Peter Johnson
December 17, 2022
Verified

This Russian Honey Cake is simply great. I made it for my wife's birthday, and the kids loved helping with the layers. The honey flavor is awesome and it was a hit at the party.

Pavel
April 3, 2022
Verified

Delicious layers rocked

Sophie Dupont
February 14, 2022
Verified

Delicious! I made this cake for my husband’s birthday, and the children loved the taste. The honey flavor is extraordinary and the layers were so easy to work with. Everyone asked for the recipe.

Oliver Green
December 26, 2021
Verified

Simply delicious cake

Alice
September 26, 2021
Verified

This Medovik was superb! I made it for my husband's birthday, and he loved every bite. So yummy!

Taste of the dish
Accuracy of stated difficulty
Instruction accuracy
Would you recommend this recipe to others?
0/1000
Add photos
Upload photos of your result. This will help others see how the dish should look.

Author Information

Email will not be displayed publicly