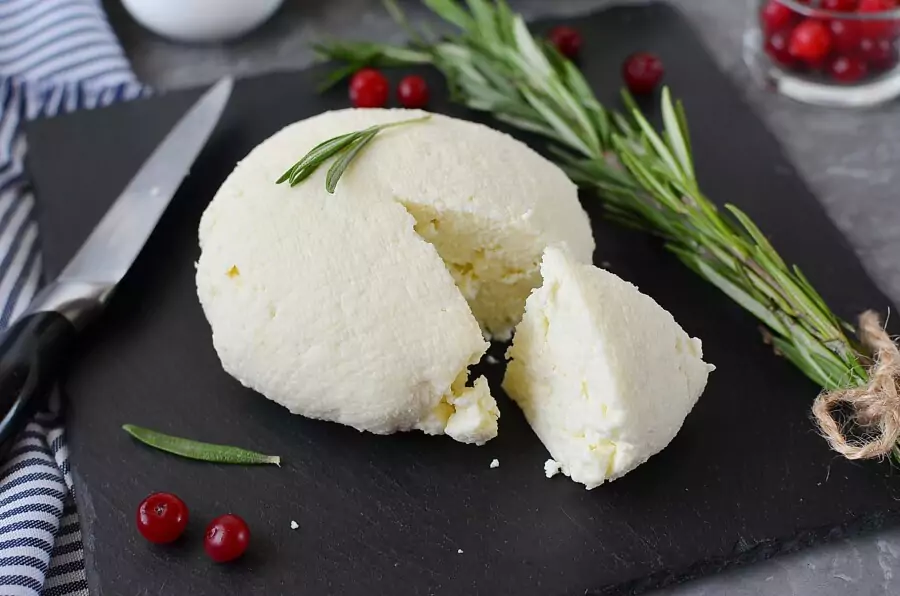
Queso Fresco is a Mexican cheese with a fresh, milky, mild flavor and texture. It is made from whole milk and vinegar. As this recipe shows, it’s actually really simple to make at home – all you need in terms of special equipment is cheesecloth to help with the draining process. Queso fresco is super versatile and you can serve it on many Mexican dishes or you can bake it in the oven or even use it as a fresh substitute for feta or goats cheese in salads.
Making the queso is super easy too. Start by heating ½ a gallon of whole milk. Add 2 types of vinegar so that the milk curdles and curds of cheese start to appear. Then begin the draining process using a colander lined with cheesecloth. Once you have formed the cheese and drained it for the final time, place it in the refrigerator until you are ready to use it.
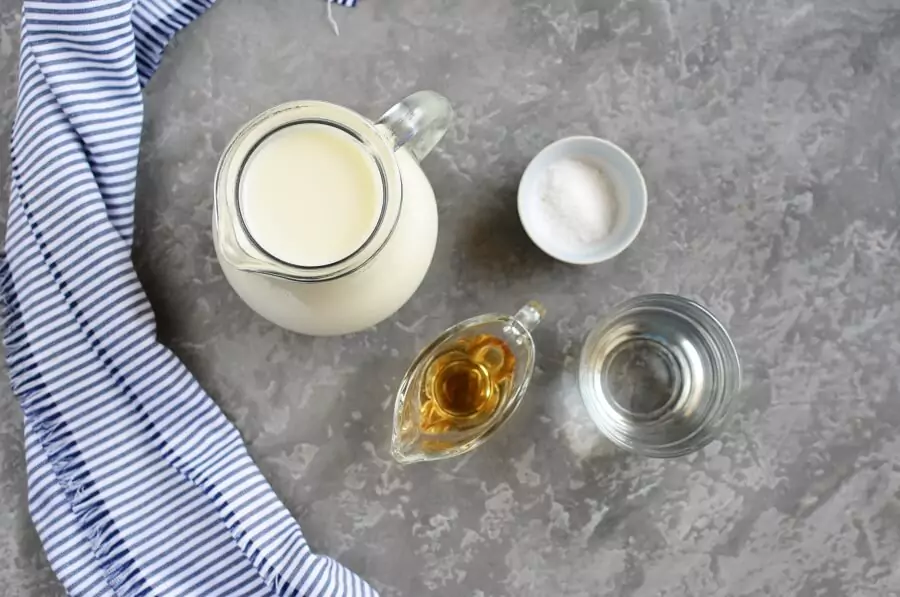
To make Queso Fresco, you will need the following ingredients:
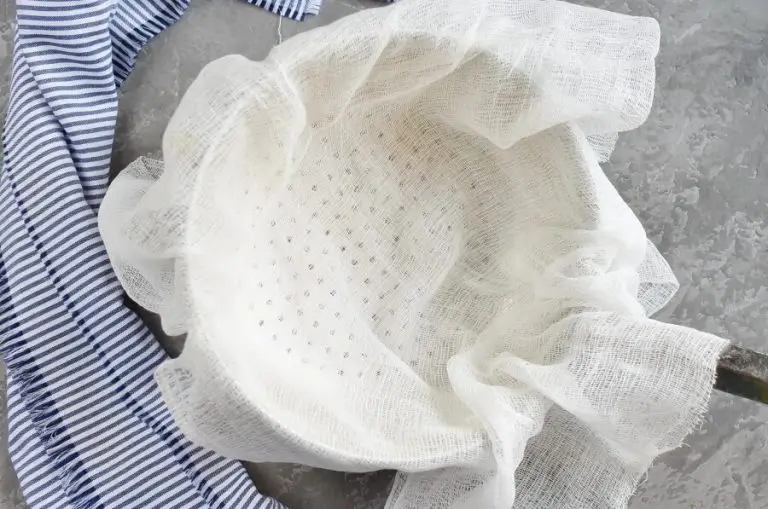
Line a colander with cheesecloth. Place the colander over a large bowl or pot.
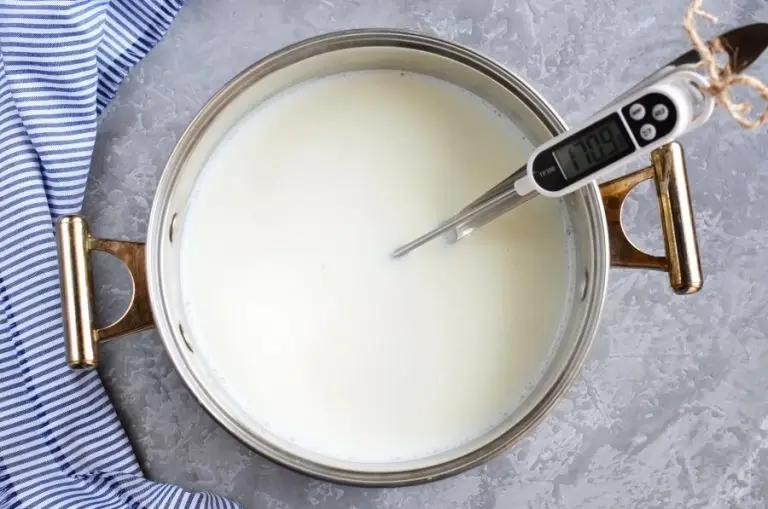
Place ½ a gallon of milk in a pot and heat to 170°F, stirring constantly to ensure even heating.
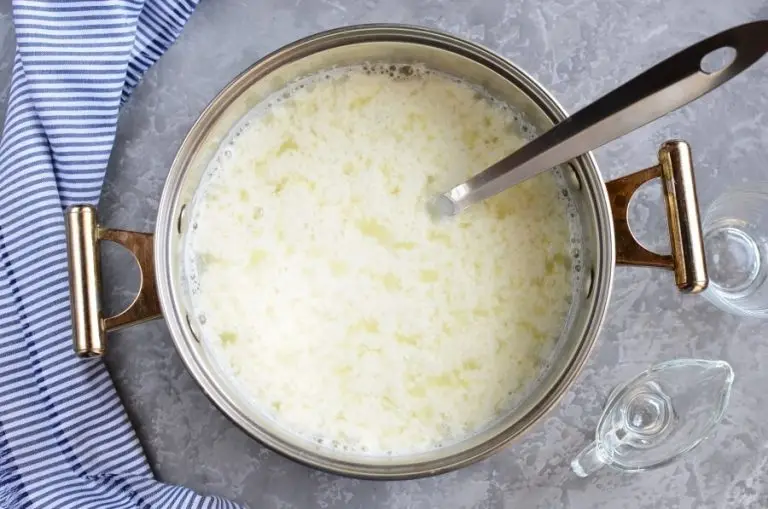
Once the milk reaches 170 °F, remove the pot from the heat. Add ⅔ of a cup of distilled white vinegar and one tablespoon of apple cider vinegar. Stir well and allow the mixture to rest on the stove top for 30-45 minutes until curds form.
Use a knife to gently break up the curds that form in the milk. Once broken, carefully transfer the curds to the colander using a slotted spoon. Allow the curds to sit and drain untouched in the cheesecloth for 30 minutes.
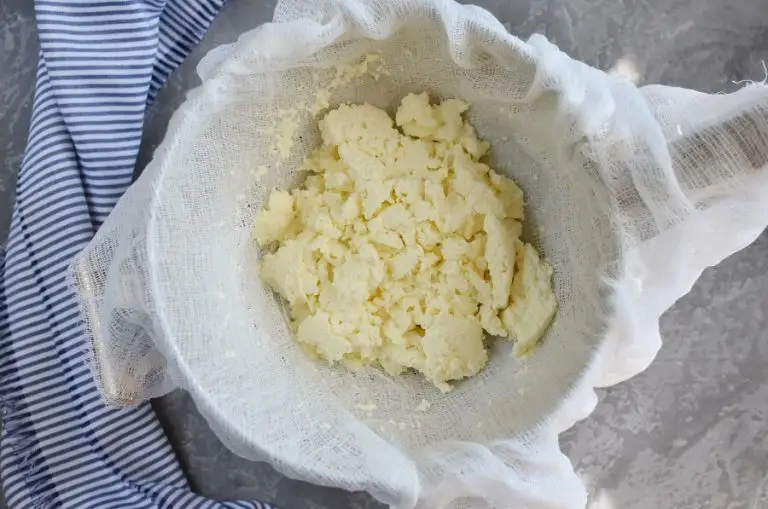
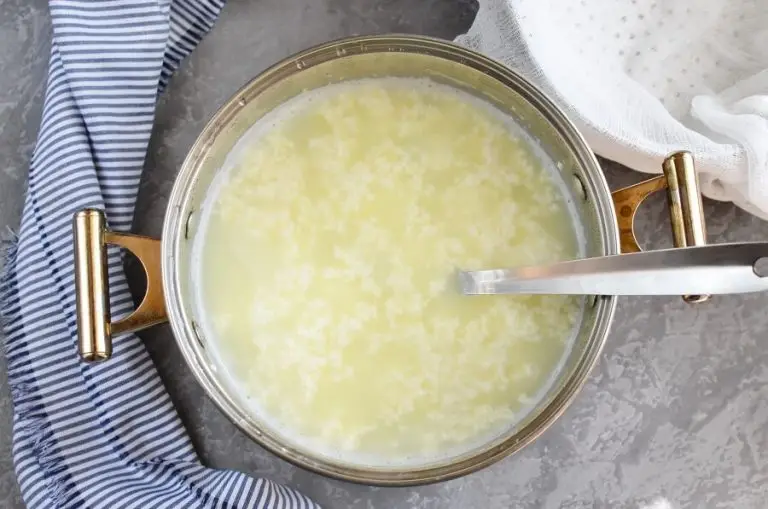
Add 1 ½ teaspoons of salt and stir lightly.
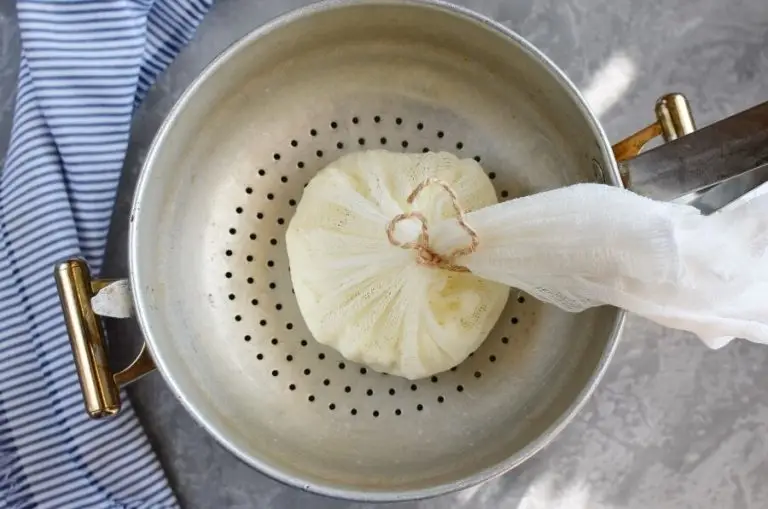
Tie the edges of the cheesecloth together using kitchen twine. Hang the parcel from a faucet, and allow the liquid to drain for a further 30 minutes.
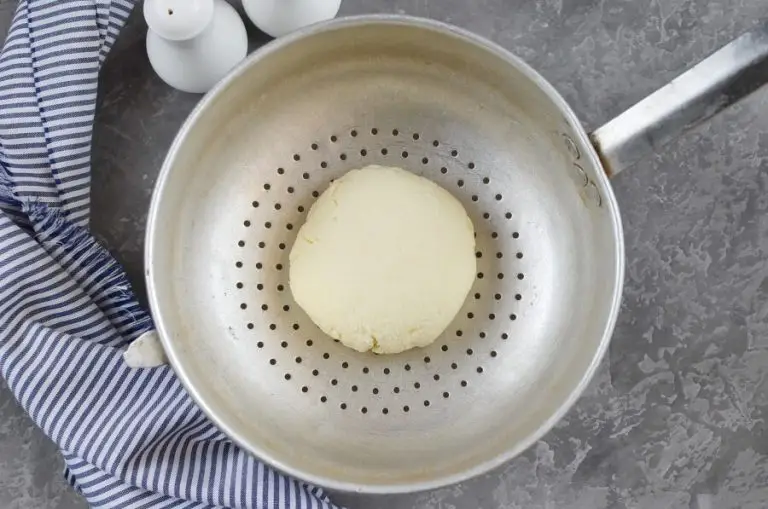
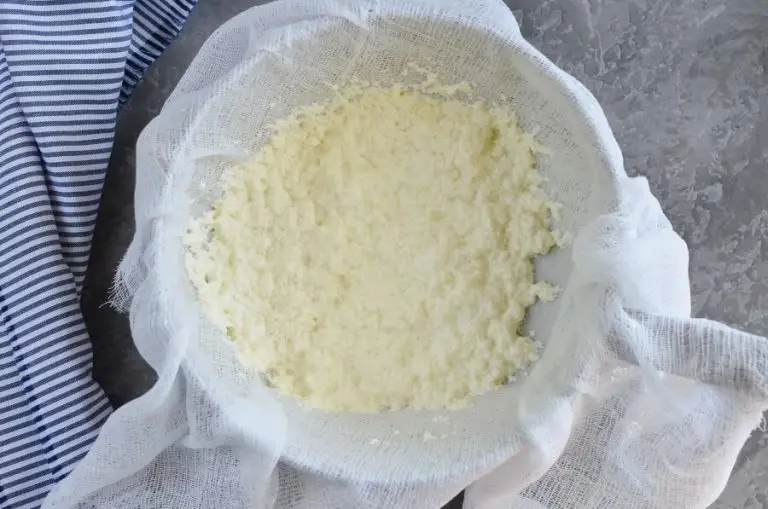
Remove the curds from the cheesecloth. Gently shape the cheese into a flat disc using your hands. Return the cheese to the colander. Leave it to sit for about 30 more minutes.
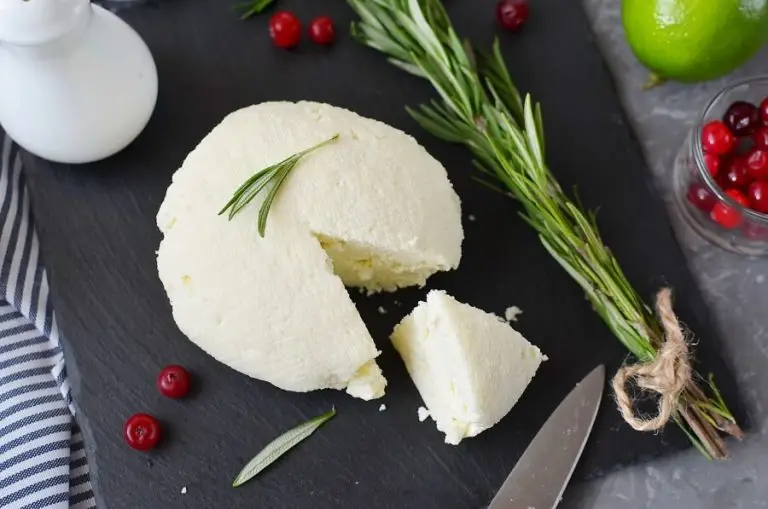
Transfer the queso fresco to a nice bowl. Refrigerate until you are ready to use it.
You’ll be surprised at how easy this Queso Fresco is! Make a batch soon and you try out all of the Mexican queso fresco recipes on this site! If you try it, make sure you tag #CookeMeRecipes in your insta pics!